Before you leave...
Take 20% off your first order
20% off
Enter the code below at checkout to get 20% off your first order

The customer service was fantastic, they helped me so much more than I expected and went above and beyond to get me what I wanted.
Beautiful Paper, easy to work with.
Brilliant customer service. Thank you
I bought a few of these lovely transfers and I absolutely LOVE them. They look great and they're very easy to apply to a painted box. What I really like about applying these transfers is that when you use the stick (that's included) to rub down the transfer onto your surface, you can see very clearly when the transfer's applied and is no longer stuck to the sheet of backing plastic. And it only takes a minute of fairly firm rubbing to apply them onto whatever surface you're using. I put my little chameleon onto the top of a round box lid that I'd painted gold, and then I sealed it with a layer of Triple Thick Gloss Glaze. This is a step you shouldn't miss because the transfers can come off if they're not sealed. And now I'm going to buy some more of these great transfers. Thanks Aussie Decor Transfers 😘 It's great to see an Australian company making these beautiful transfers and decoupage papers.
Great price! Vibrant colors.
Just what I need.
Excellent quality transfers, great price.
Just what I need.
I've used a lot of different brands but the Aussie Wonderfoil Size Glue is the best. It's easy to use, quick drying and it never leaves an uneven finish. I use it on all foils and my product comes out perfect every time. I've used it for years and try new ones on the market but always go back to this one. It's also Australian Made which is a plus for me.
Generous size and sturdy transfers. Enjoy using
The paper was beautiful and arrived very quickly!
Very cute paper! Arrived intact and is as described on seller’s site! Very pleased with this product.
This review has no content.
A++ Great product very happy.
Good item, fast delivery, pleased.
Great quality, fast postage will definitely shop here again.
Beautiful. I have not started my project yet but when it is finished I will post a pic.

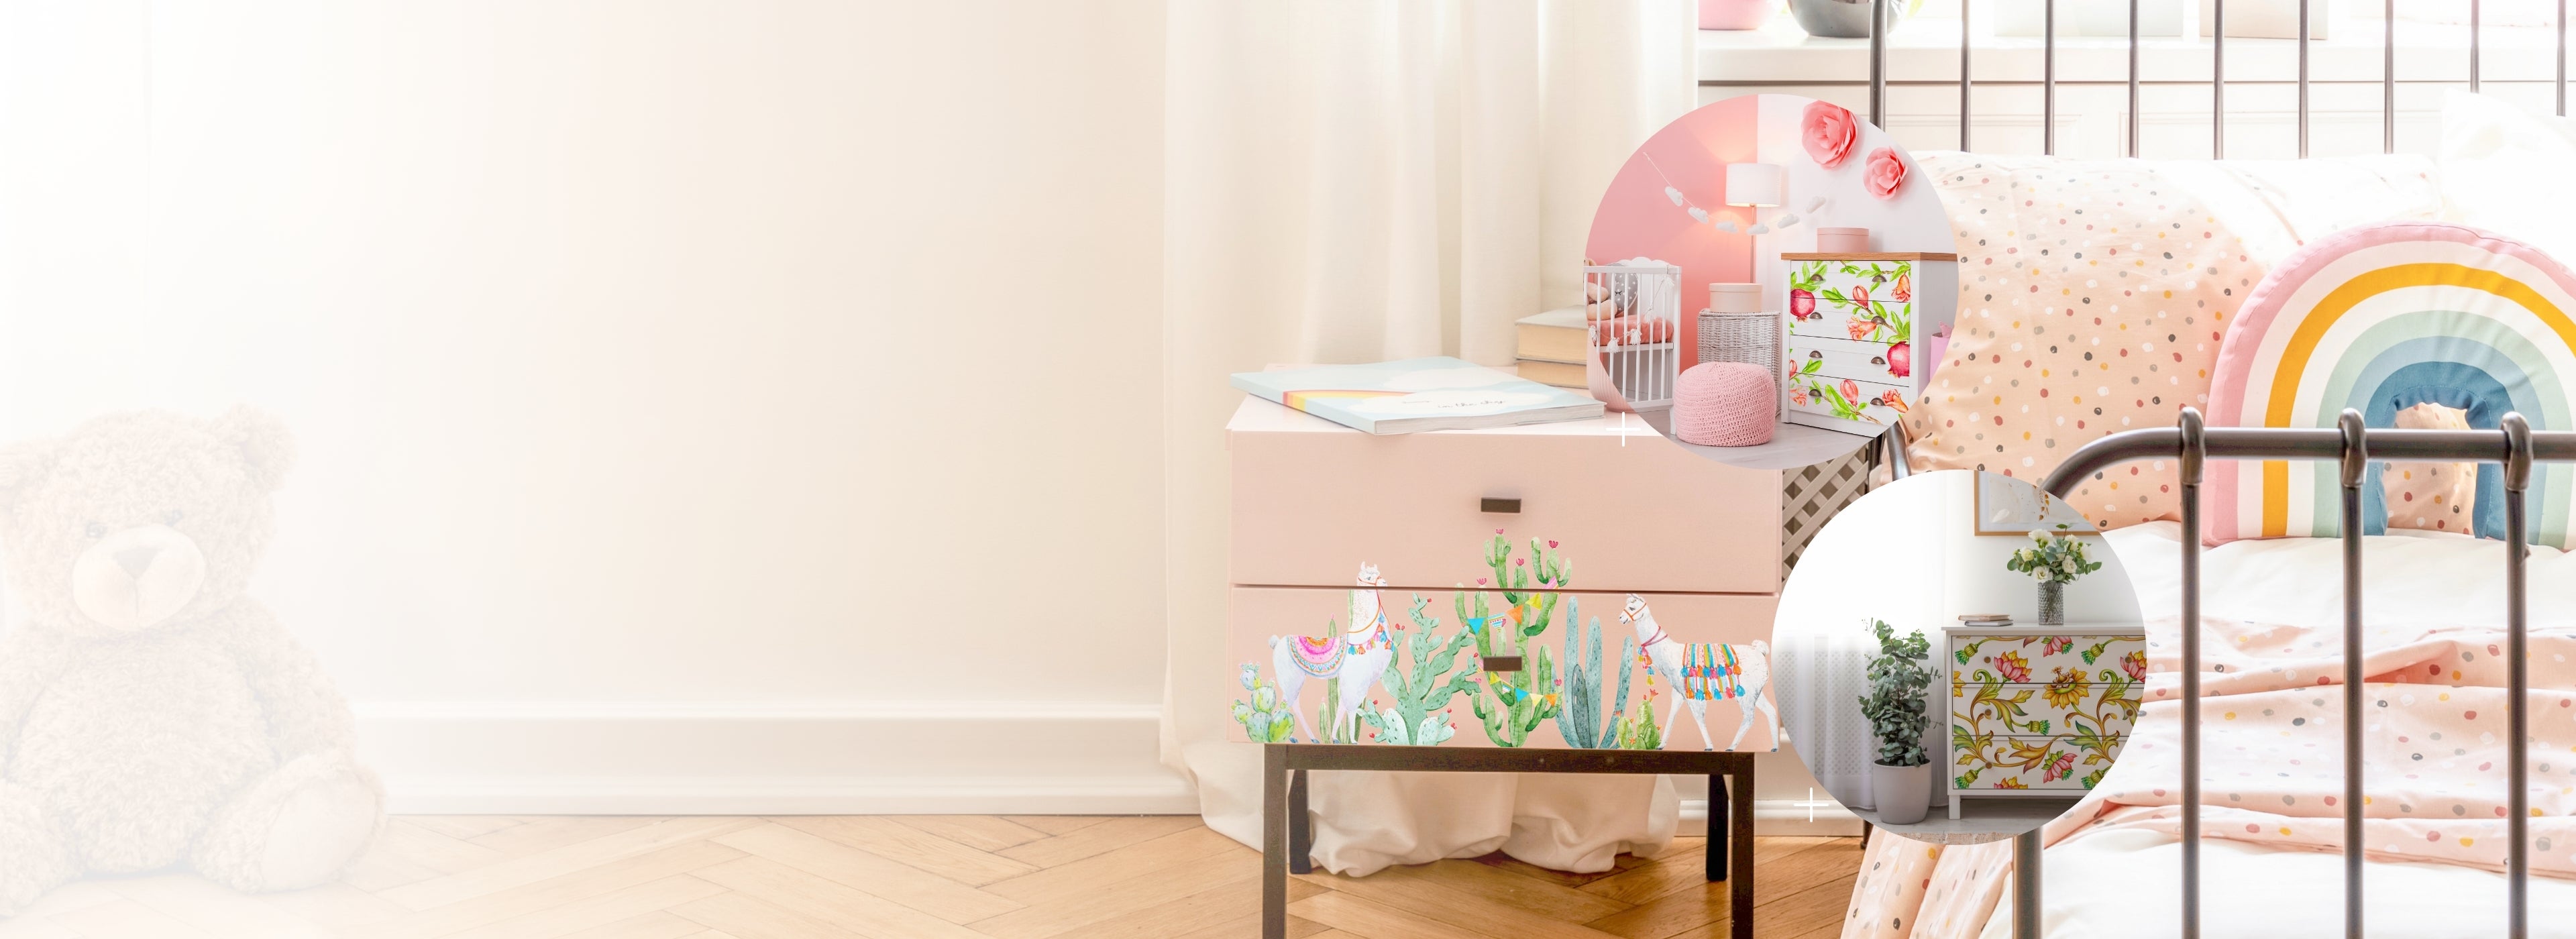
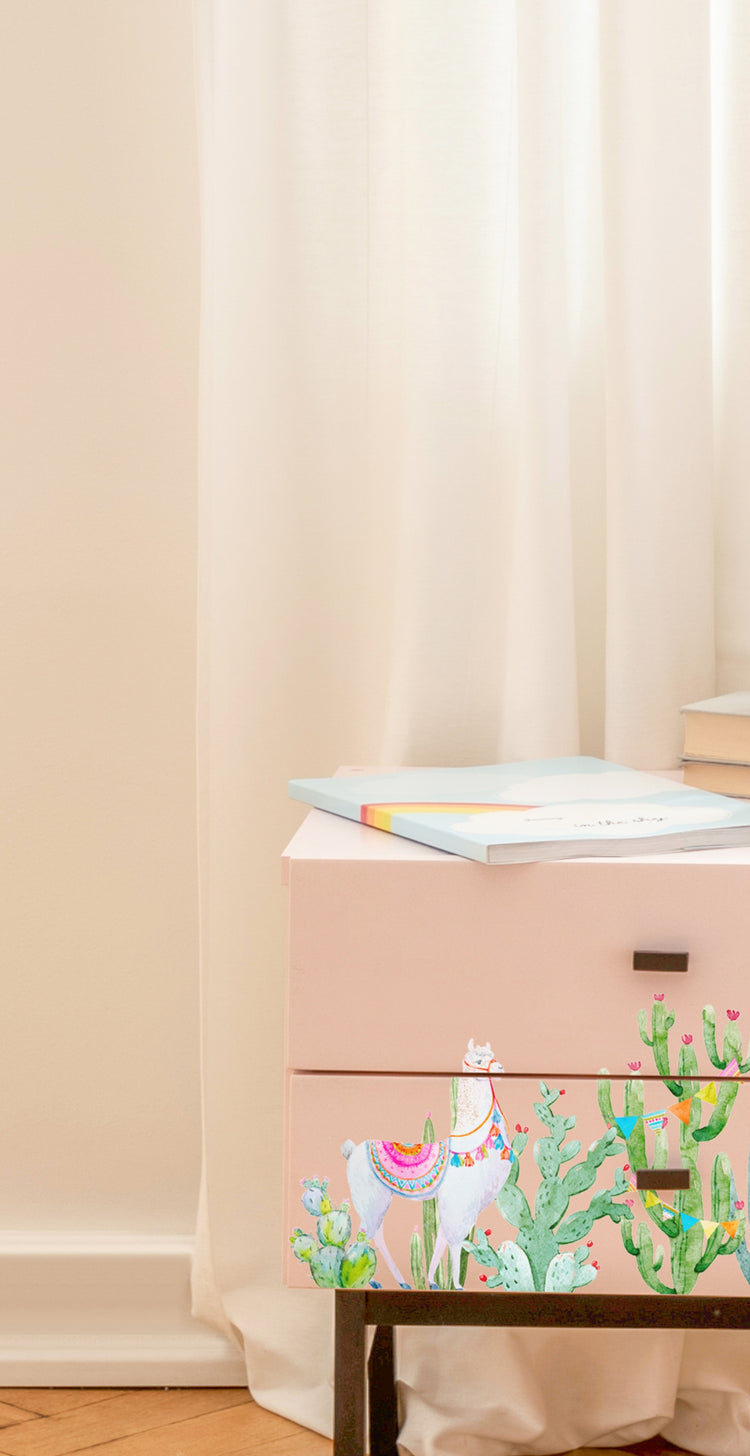
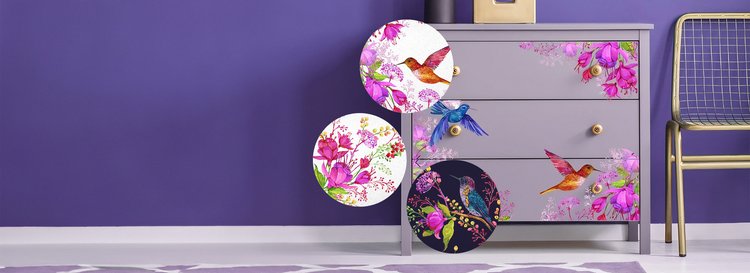
Rub on transfers are a type of decal that can be applied to various surfaces such as wood, metal, glass, ceramic, fabric and more. They are made of a thin layer of adhesive film with a printed design on top.
To use them, you need to peel off the backing paper, position the transfer on your desired surface, rub it firmly with Aussie’s transfer tool and then peel off the clear top layer. The design will be transferred to the surface with a smooth and seamless finish.
Watch here for more info.
Rub on transfers are easy to use and require no special skills or equipment. They can transform your furniture and craft projects with beautiful and detailed designs that look like hand-painted art. They are also durable and long-lasting, as they adhere well to most surfaces and can be sealed with a top coat for extra protection. Rub on transfers can also be layered, distressed, sanded or waxed to create different effects and styles.
The size and design of rub on transfers depend on your personal preference and the type of project you are working on. You can select from a variety of sizes, from small accents to large furniture decals.
Watch here for more info.
You should store your rub on transfers in a cool, dry, and dark place, away from direct sunlight, heat, and moisture. You should also keep them in their original packaging or in a plastic bag to prevent dust and dirt from damaging them. Avoid bending, folding, or creasing your rub on transfers, as this may impact their quality and performance. You should also handle them with care as transfers are fragile, and avoid touching the adhesive side with your fingers.
Yes, you can use rub on transfers on curved or uneven surfaces, such as chairs, lamps, vases, or bottles. However, you may need to use some extra steps and tools to ensure a smooth and even application. For example, you can use a hair dryer or a heat gun to warm up the transfer and make it more flexible and pliable. You can also cut the transfer into smaller pieces or shapes that fit better on your surface. Once adhered, use a soft cloth to press and smooth the transfer firmly and evenly onto the surface.
Watch here for more info.
Yes, you can paint over rub on transfers if you want to create a different effect or style. However, you should wait at least 24 hours after applying the transfer before painting over it. You should also use a water-based or acrylic paint that is compatible with your surface and your transfer. Do not use oil-based or spray paint, as they may damage or dissolve the transfer. Apply the paint in thin and even coats, and avoid rubbing or scratching the transfer.
To remove a transfer from your surface, you will need to use a solvent or a heat source to loosen the adhesive. You can use a product such as Goo Gone or Un-Du to dissolve the adhesive and peel off the transfer. You can also use a hair dryer or a heat gun to warm up the transfer and scrape it off with a plastic card or a scraper. You should be careful not to damage your surface or burn yourself when using these methods.
Yes, you can layer rub on transfers on top of each other to create a more complex and interesting design.
Watch here for more info.
To protect your rub on transfers, you should use a water-based clear top coat to seal them after applying them and before using any other finishes, including wax. You should also avoid exposing your rub on transfers to direct sunlight, heat, moisture, or chemicals that may damage them.
A rub on transfer unopened in the tube can last for 12 months if stored properly. You should store your rub on transfers in a cool, dry, and dark place, away from direct sunlight, heat, and moisture. You should also keep them in their original packaging or in a plastic bag to prevent dust and dirt from damaging them.
Avoid bending, folding, or creasing your rub on transfers.
After 12 months, the adhesive may start to dry out on your transfer. This happens to all brands of transfers. If you have a transfer like this, all is not lost! Aussie Décor have a pump action spray bottle of a specialised ‘Adhesive Activator’ for dried out transfers.
You just spray it on the reverse side of the transfer sheet and let it dry for a few hours until the adhesive is clear and tacky. Then you apply your transfer as normal.
Climate definitely influences rub on transfers in some ways. Extreme temperatures, humidity, or dryness can cause the transfer to become brittle, sticky, or warped. You should avoid applying rub on transfers in very hot or cold conditions, as this may affect the adhesion and appearance of the transfer.
You should also avoid exposing your rub on transfers to direct sunlight, heat, moisture, or chemicals that may damage them. If you live in a humid or dry climate, you may need to adjust the amount of pressure and time you use to apply the transfer.
You should use sharp and precise scissors or sharp cutting tools to cut decoupage paper.
Thoroughly clean the surface and let it dry completely before applying the decoupage paper.
Aussie Décor Transfers recommend the ‘wet application’ method. You can watch a video that shows this method on our website in the decoupage section. You will need glue or decoupage medium such as top coat, a long mist spray bottle which you will find in our accessories collection and finally, the MOST IMPORTANT tool – Aussie’s felt edge decoupage application tool. This tool is a MUST.
You can watch here for more info.
Aussie’s Luxe Decoupage Papers are a custom, purpose designed and manufactured hybrid rice paper and mulberry paper. The white threads are silk, harvested from the mulberry tree. These threads add strength and stability to the paper, greatly reducing the risk of tearing. The silk threads also add tactile and visual dimension.
Aussie Decor posters are high quality Poster Prints printed on sturdy Photographic Paper with a satin finish and a water resistant protective film on the front, which makes these posters tear proof and almost indestructible! Not Your Average Poster Print!
Our Aussie Decor Poster Prints can be applied to any hard surface such as furniture, home decor, school or office supplies. To apply our Poster Prints to a hard surface, apply PVA/wood glue or mod podge to the surface you are applying to and also to the back of the poster print. Using our Felt Edged Decoupage Applicator Tool gently but firmly smooth out from the centre outwards any bubbles or excess glue to create a smooth surface that is adhered well.
There are several ways to display your Aussie Decor poster:
Framing: You can frame your poster using a standard picture frame. Choose a frame that complements the poster’s design and fits its dimensions.
Mounting: Use double-sided tape, adhesive strips, or poster putty to mount the poster directly on the wall.
Clipboards or Poster Hangers: Clipboards or specialized poster hangers allow you to easily switch out posters without damaging them.
Poster Rails: These are horizontal rails that hold the top and bottom edges of the poster. They provide a clean and minimalist look.
While Aussie Decor posters are primarily designed for indoor use, some designs may be suitable for covered outdoor spaces. However, prolonged exposure to direct sunlight, rain, or extreme weather conditions may fade or damage the poster.
To keep your poster looking its best:
Remember to check the specific instructions provided by Aussie Decor for each poster, as care and display recommendations may vary based on the design and material.
Yes, Aussie Decor offers posters in various sizes. Check the product descriptions or website for specific dimensions. You can choose a size that fits your chosen project.
Follow Aussie Decor Transfers on social media and join our Aussie Decor Transfers Creative Club for project ideas, tutorials, and inspiration. You’ll discover endless possibilities for using our Poster Prints in your art projects and home decor.
They are PVC vinyl prints that are extremely robust and hardwearing. They can be applied to tabletops and other furniture surfaces that sustain high traffic use. They have adhesive backing that can be peeled and stuck to any smooth surface. They come in various designs and sizes to suit your preference.
Our Aussie Decor Peel & Stick Vinyl Prints can be applied to any non porous surface such as glass, furniture, home decor, school or office suppplies.
You need to clean the surface where you want to apply the print and make sure it is dry and dust-free. Apply a water based clear coat to seal any porous surface such as timber, chalk painted furniture, leather, etc and allow to dry as recommmended.
To start, peel back the backing paper from the print slightly and position it on the surface. Using our Felt Edged Decoupage Applicator Tool gently but firmly smooth out from the centre outwards any bubbles to create a smooth surface. Peel the backing sheet off slowly as you go working out any bubbles or wrinkles. Trim off any excess material with a sharp knife or scissors. For a how to video on applying our Peel & Stick Vinyl Prints, click on any of the listings under Peel & Stick Vinyl Prints to watch the easy to follow video.
Once applied, seal any edges and cuts with a water based clear coat.
You can peel back the print from the surface by lifting one corner and pulling it up slowly and gently, to readjust and remove wrinkles and air bubbles as you apply it to your project.
You can wipe the print with a damp cloth or a mild water based cleaner to remove any dirt or stains. Do not use any abrasive or harsh chemicals that may damage the print. Avoid exposing the print to direct sunlight or extreme temperatures that may cause fading or cracking.
Yes, Aussie Decor offers Peel & Stick Vinyl prints in various sizes. Check the product descriptions or website for specific dimensions. You can choose a size that fits your chosen project.
Follow Aussie Decor Transfers on social media and join our Aussie Decor Transfers Creative Club for project ideas, tutorials, and inspiration. You’ll discover endless possibilities for using our Peel & Stick Vinyl Prints in your art projects and home decor.
Using an extra large stencil on furniture can help you create stunning and unique designs that cover a large area of your furniture piece without having to move and relocate your stencil to achieve a continuous repeat pattern.
A purpose designed XL stencil for furniture can create a focal point, a background pattern, or a border effect on your furniture. You can also use the stencil to create a cohesive look for your furniture set by repeating the same design on different pieces.
You can watch here for more info.
You will need painter’s tape or masking tape, as well as a tape measure or a ruler to ensure your stencil position is straight.
You can also use a low tack spray adhesive instead of tape to secure your stencil.
You can watch here for more info.
There are a number of different ways to prevent bleed through when using a stencil, but the most important rule to remember is to offload your brush, sponge, or other paint application tool. You can offload the paint on your paint palette, a rag or paper towel.
Yes! Our stencils are made from thick mylar which is perfect for medium application to create a raised 3D pattern.
Mica powder is a fine, shimmering powder that comes from a natural mineral called mica. Mica powder comes in a number of different varieties including such as pearlescent, metallic, iridescent, and holographic. They all produce very distinct effects.
Mica powder can add sparkle and dimension to craft, art & furniture projects. It can be used as a colourant, a paint, or a texture enhancer.
Mica powder can be mixed with different mediums, such as resin, paint, glue, wax, and more.
The amount of mica powder you need depends on the type of project, the medium you are using, and the effect you want to achieve. A general rule of thumb is to start with a small amount of mica powder (about 1 teaspoon) and add more as needed.
You can also use a scale to measure the exact amount of mica powder you require. For example, for epoxy resin projects, you can use about 5 grams of mica powder per 100 grams of resin.
You can watch here for more info.
There are different ways to apply mica powder to your project, depending on the medium you are using and the effect you want to create. Some common methods are:
Sprinkling — You can sprinkle mica powder directly onto your project or onto a wet medium (such as glue, top coat or paint) to create a sparkly effect.
Mixing — You can mix mica powder with a medium (such as top coat, paint, or resin) to create a coloured and shimmery mixture that you can apply to your project like paint.
Stencilling — You can use a stamp or a stencil to apply mica powder onto your project or onto a wet medium (such as glue or paint) to create a patterned effect.
Dry Brushing — You can use mica to dry brush or highlight certain areas of your project.
You can watch here for more info.
Aussie’s Mica Dust is cosmetic grade and is safe to use for your projects. However, some precautions should be taken when working with mica powder. Mica powder is very fine and can be inhaled or ingested if not handled properly.
Therefore, you should wear a mask and gloves when working with mica powder and avoid contact with your eyes and mouth. A well-ventilated area work area is best.
There are three ways to mix mica powder with resin for your furniture project: pre-mixing, swirling and sprinkling.
Pre-mixing involves adding mica powder to mixed resin and hardener before you pour.
Swirling involves adding mica powder to a separate mix of resin and hardener and adding this to the initial pre-pour in a swirling organic motion.
Sprinkling is mica straight out of the bottle, sprinkled onto your wet pour. Aussie’s 50gm mica bottle has a butterfly lid with one side specifically for sprinkling.
Always use all precautions when using resin, as recommended by the resin manufacturer.
Wonderfoils are innovative decorative transfer sheets designed for various artistic and creative projects. They come in a range of stunning designs and can be applied to different surfaces.
Applying Wonderfoils is easy! Apply the Wonderfoil Size Glue to the desired area and allow to tack up. This can take 15 to 20 minutes or more depending on room temperature. Use a burnishing tool such as a stiff artist brush or anything that has a textured hard surface to it, to transfer the foil onto the surface. The result is a beautiful metallic or holographic effect.
Wonderfoils adhere well to smooth surfaces like wood, glass, ceramics, and canvas. They can also be used on fabric, paper, and other creative projects. Make sure the surface is clean and dry before applying the Wonderfoil Size Glue (allow to tack up) and then your desired Wonderfoil.
Yes! To protect the design and enhance durability, apply a clear water based sealant over the Wonderfoil transfer. This will help prevent scratches and ensure longevity.
Unfortunately, Wonderfoils are not reusable. Once applied, they become a permanent part of your project. Make sure to choose your design carefully before applying.
Absolutely! Get creative by layering different Wonderfoil designs to achieve unique effects. Experiment with colors, patterns, and textures for stunning results.
Follow Aussie Decor Transfers on social media and join our Aussie Decor Transfers Creative Club for project ideas, tutorials, and inspiration. You’ll discover endless possibilities for using Wonderfoils in your art and decor.
Share your creations on our Aussie Decor Transfers Creative Club
We'd love to see your artwork!